

I designed this Hair Clip Tidy for my daughter so she could hang it in her bedroom and keep her hair clips in one place and off the floor! We used it ALL the time wen she was little and they made great little birthday gifts for all her friends.

You can also thread Alice Bands through the bottom loop. I also sometimes make them with a popper fastening at the bottom so you can keep hair bands tidy too.
We have made a little You Tube video to show you how to make one. Its a quick overview of the tutorial below.
You Will Need:
2 FQ's of cotton fabric.
Stuffing
Thin ribbon approx 20cm long
Wide ribbon approx 64cm long
Button
To Make:
The first step is to make a template from some old cardboard. A cereal packet is perfect or you can download a pattern for FREE here. I make mine 14cm x 14cm. You can make them bigger or smaller though.
Choose 2 fabrics for your hair clip tidy. I tend to use a vibrant patterned fabric on the front with a co-ordinating gingham or spotty fabric on the back but again its up to you. Draw around your template on each fabric and cut them out so your have 2 squares of fabric.

At this point I find it helpful to measure and fold over a quarter inch of fabric at the top of both pieces of fabric. Fold the patterned side over to the wrong side of the fabric. This makes sewing up the top easier later on as you will see!

Cut the ribbon you would like to use. The length is completely up to you. I generally use around 64cm. Find the middle of your top fabric square and place the ribbon face down on the patterned side of the fabric with the longer end of the ribbon overhanging the top edge. Leave a small bit of ribbon overhanging at the other end.

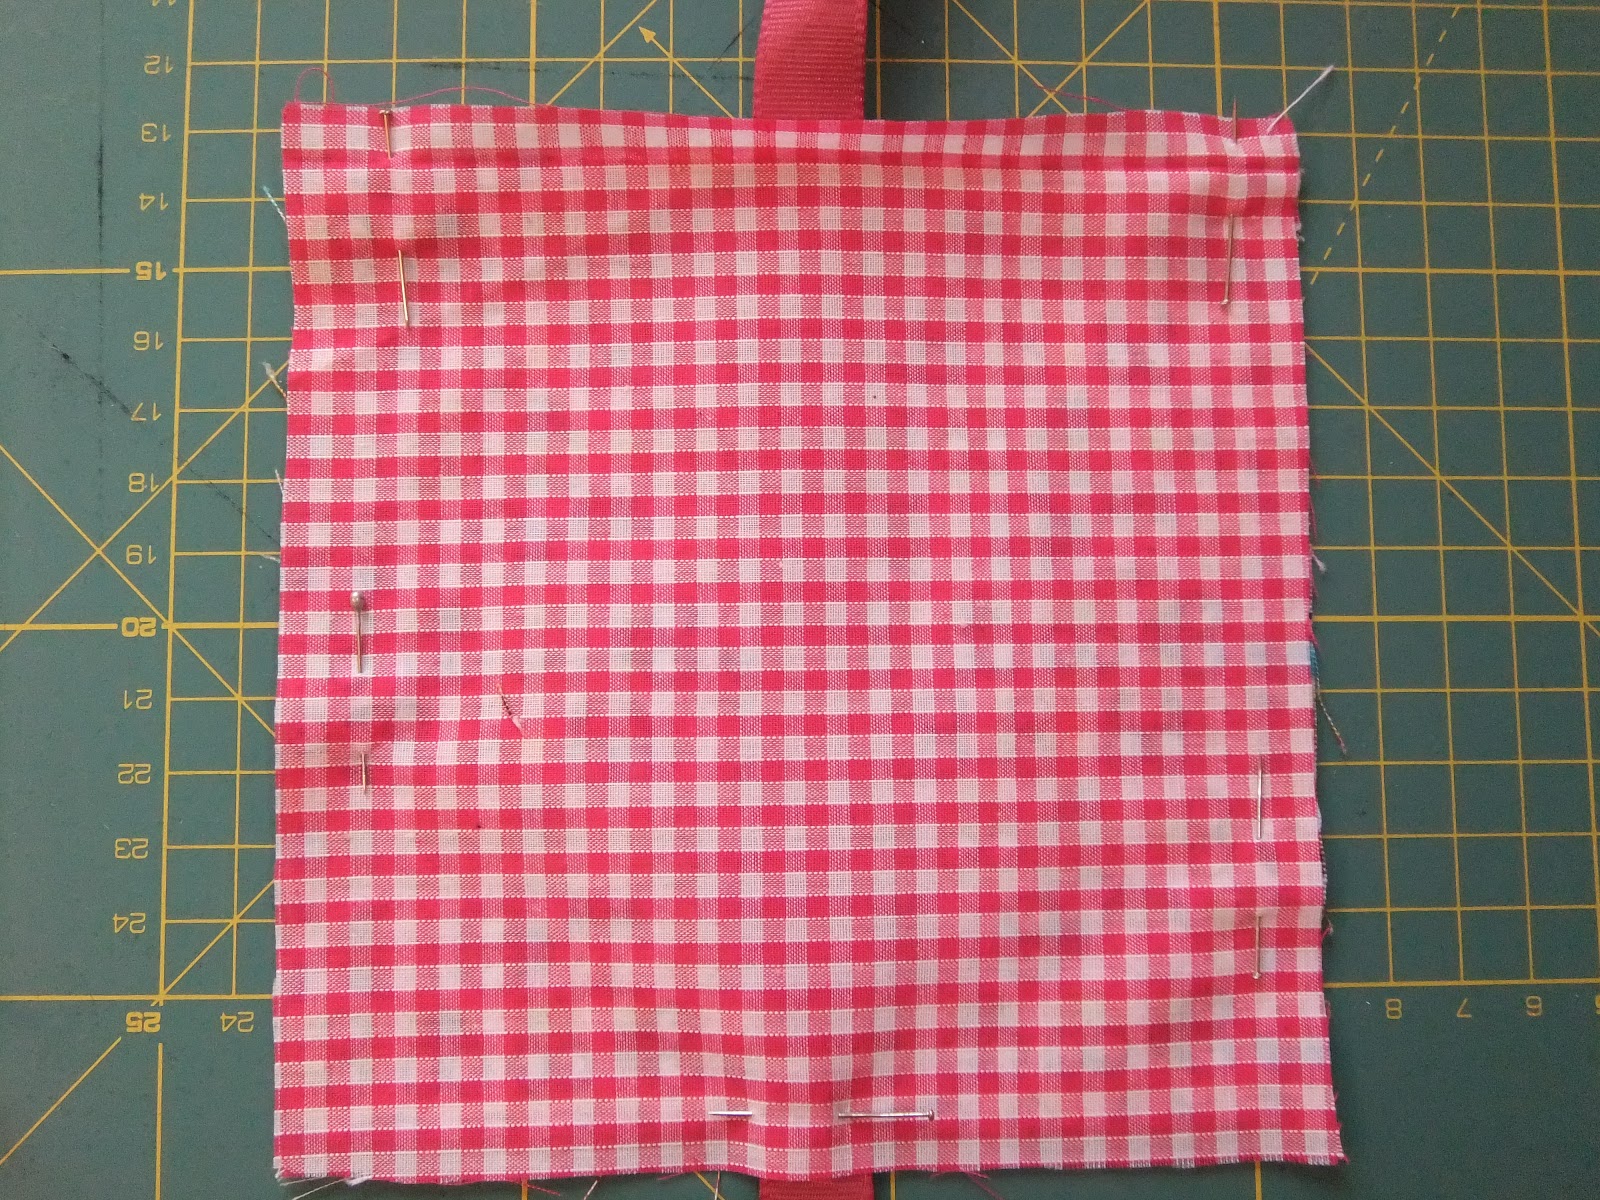
Place the back fabric face down over the patterned fabric and pin down one side along the bottom and up the other side. The top should be left open at this stage. You will need to pull up the fold you ironed earlier and sew right to the top of the fabric making sure you do a reinforcing stitch (stitch backward and forward) at each end. Use a quarter inch seam allowance.
Use pinking shears to trim the edges to prevent fraying and clip the bottom corners.

Turn inside out and press. It should look like this. The top edge should fold in easily along the lines that you pressed earlier so fold it back down

Stuff until you have a nice shape. Not too full just enough to give it a bit of body.

Pin along the top. The pressed edges should give you a nice straight seam which matches up perfectly. You will need to add a short length of ribbon to hang the hair clip tidy. Around 20cm is good. When you pin along the top edge place each end of the ribbon about 1/2 inch from the side edges. Sew all along the top of the tidy. This can be a bit fiddly.

Make sure you enclose the ribbon by sewing as close to the edge as you can. You may want to finish off the threads at each end by hand sewing at the back to ensure it is neat and secure.

You have nearly finished! At the bottom of the ribbon make a loop. This can be any size you like.

Sew a button to keep the loop in place to complete the end of the ribbon nicely

Voila your finished Hair Clip Tidy. You just need to add some pretty hair clips!


Gorgeous!


You can make so many different versions depending on your fabric.


Use quirky buttons to finish them off


Let us know if you make a hair clip tidy. You can tag us in on facebook or instagram. We are @sewscrumptious
Happy Sewing!